
If you are on a gluten free diet, and if you’ve ever been graced by the presence of a frozen Pillsbury Toaster Strudel, chances are you have probably been missing this breakfast treat. I’m here to help 🙂
While these aren’t made in the toaster, it is definitely reminiscent of a toaster strudel from days of old, and they are so easy to put together for a breakfast or brunch. You can make them any flavor you want by using your favorite fruit preserves. I’ve included a little bit of cornstarch (or arrowroot powder) in the recipe to be whisked with the preserves to help it thicken a little more as it cooks inside the pastry. This helps the filling to stay inside and not bubble out as it’s cooking. Be cautious to make sure your pastries are fully sealed around all edges before popping them into the oven. If you don’t, the filling will bubble out and quite possibly burn. Have fun with the icing. The coloring is optional, but I’ve included a link for one of my favorite all natural food colorings below which is the one I used for this photo.
Make sure you remember to thaw your frozen puff pastry the day before or 4 hours before you want to make them. In a pinch you can thaw puff in the microwave, but I have much better results when I plan ahead for these.
Shop This Recipe:
Get one of my favorite natural food coloring kits HERE (this kit includes fun sprinkles too!)
If you want to try out my favorite natural colored sprinkles, check them out HERE
These preserves are my favorite to buy and there is a really sweet story behind the brand and what they stand for. Purchase my favorite preserves HERE.

Gluten Free Puff Pastry Berry Strudels
Makes 6 Individual Strudels
Ingredients:
- 1 package of gluten free puff pastry (2 sheets) thawed according to package directions (see notes for brand choice)
- 6 tablespoons fruit preserves
- 2 teaspoon cornstarch or arrowroot
- 1 egg + 1 tablespoon milk or non-dairy alternative
For icing:
- 1 cup powdered sugar
- 1 tablespoon milk or non-dairy milk
- Optional: a few drops of liquid or a small amount of powdered natural food coloring. See “shop this recipe”above for my favorites.
Directions:
- Preheat the oven to 400 degrees Fahrenheit and cover a baking sheet with parchment or a silicon baking mat.
- Make an egg wash by whisking 1 egg + 1 tablespoon milk until uniform and no clumps remain. Set aside.
- Whisk together 1/3 cup +1 tablespoon fruit preserves with 2 teaspoons cornstarch or arrowroot. Set aside.
- Unroll 2 sheets puff pastry and cut each sheet into 6 equal rectangles.
- Place the puff pastry rectangles on the baking sheet and brush the outside edges of each rectangle with the egg wash. (Putting them on the baking sheet now just makes it easier so there is no worry of breaking the seams when transferring them from one surface to another.)
- Place one tablespoon preserves on 6 of the 12 rectangles. Use the other rectangle with no filling to cover the filling side, and pinch the seams together very well making sure there are no gaps. You may use a fork to crimp them, but I find my fingers work best for getting them completely sealed.
- Brush the tops of all the pastries with the egg wash.
- Cut one or two slits in the top of each pastry so steam can easily escape while baking, making sure to cut through the top layer of pastry but not through to the bottom.
- Space the pastries evenly apart on the baking sheet and bake for 18 minutes or until the tops are golden.
- Cool for 15 minutes before drizzling on icing using a whisk or fork.
Make the icing:
In a small bowl, whisk together 1 cup powdered sugar and 1 tablespoon milk with optional food coloring. You don’t want the icing to be too thin, but it should be a drizzling consistency.
Notes:
Gluten free puff pastry: My go-to brand is Schar brand gluten free puff pastry which is honestly the only one I have ever seen at my local grocery. I like this one because it’s dairy free as well.
Using regular puff pastry: This recipe can be made in exactly the same way using non-gluten free puff pastry.
Serving suggestions: These pastries could be served as part of a breakfast, brunch, late afternoon snack with tea/coffee, or even as a dessert (warm with a small scoop of vanilla ice cream perhaps?)
Saving and reheating: While they are best fresh, the pastries will keep in an airtight container in the refrigerator for up to 3 days. I suggest reheating them in the oven or toaster oven for best results. Reheat in the oven on 350 degrees F for a few minutes until warmed through.
Did you make this recipe? Don’t forget to tag and follow me on Instagram @lizlaughlovefood and use the hashtag #lizlaughlovefood
Like my Facebook Page Liz Laugh Love Food
What’s new on the blog

My Blog Has Moved!
If you are reading this post, thank you for your continued support to Liz Laugh Love Food. Over the last several months,…
Keep reading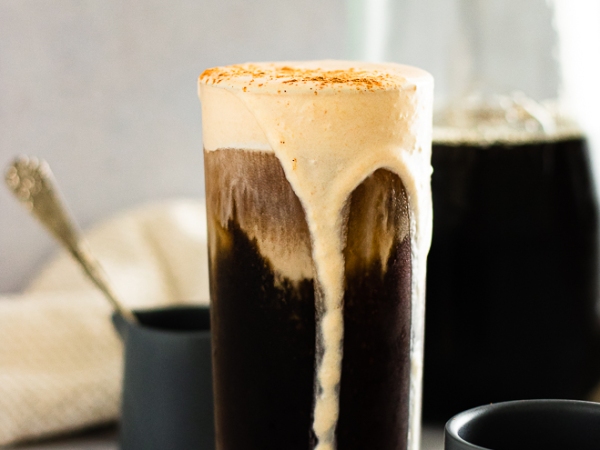
Brown Sugar Pumpkin Cream Cold Brew
I confess, I will buy a grande pumpkin cream cold brew the day they drop every. single. year, but to be completely…
Keep reading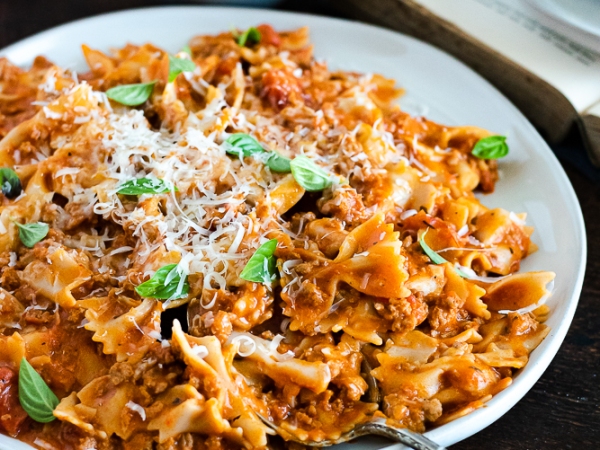
One Pot Gluten Free Creamy Italian Sausage Pasta Skillet
If you have spent any time rummaging around my blog, you know that I am a little obsessed with easy weeknight meals…
Keep reading
Gluten Free Dairy Free Chocolate Dipped Cookies and Cream Fudge Pops
I’ve had some long recipe titles, but this one might take the cake so far. When I name a recipe, I really…
Keep readingLoading…
Something went wrong. Please refresh the page and/or try again.
Got a Question?
Like my Facebook Page Liz Laugh Love Food
What’s new on the blog
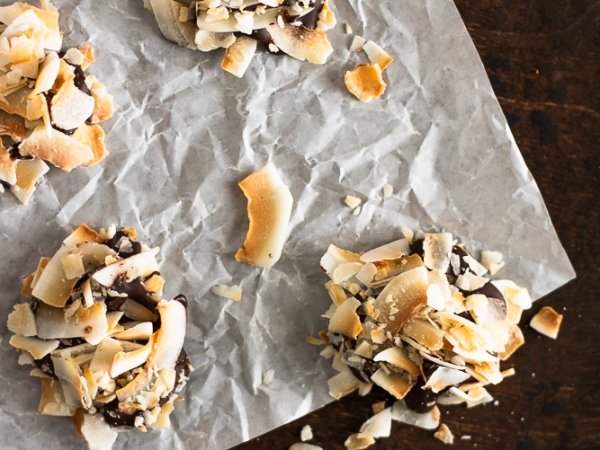
Gluten Free Vegan Dark Chocolate Coconut Clusters
These coconut clusters are straightforward, simple, and absolutely delicious. They’d be a great addition to a charcuterie board or a special movie…
Keep reading
Roasted Strawberry Tiramisu
The idea for this spin on tiramisu hit me as I dipping some strawberries in some leftover mascarpone creme I had from…
Keep reading
Gluten Free Oven Baked Chicken Tenders
When you have celiac disease or a gluten intolerance or sensitivity, something as simple as a chicken tender can be a food…
Keep reading
Gluten Free Oatmeal Chocolate Chip Cookies
The chocolate/oat combination is one of my all time favorites, so developing my own recipe for an oatmeal chocolate chip cookie that…
Keep readingLoading…
Something went wrong. Please refresh the page and/or try again.
