
I’ve had some long recipe titles, but this one might take the cake so far. When I name a recipe, I really want you to know what you’re getting into I guess.
I have always been a fan of making my own frozen treats because you can put whatever and however much of what you want inside! This sweet, creamy fudge pop is choc full of gluten free Oreos, and I cannot get enough of the chocolate magic shell on the outside. If you wanted to get crazy, you could even dip these pops in crushed Oreos before the magic shell hardens. It’s all up to you and your tastes so go nuts!

Special Equipment and Recipe Tips:
I used a silicon popsicle mold that I purchased from Amazon and that is my recommendation for you as well. If you would like to purchase the same one I have, the link is right below this paragraph. To loosen the pops from the mold, just slide a butter knife down each side and pull them out. Simple! I love with these silicon molds, there is no need to dip the bottoms in hot water and risk melting any of your precious pops. I recommend using full fat coconut milk for these pops. The less fat used, the more water there will be in the mix and that will make your pops more icy. I have used both and liked them both, but I think the full fat coconut milk works best. For the other milk used, I like using an “extra creamy” variety of oat milk. If you use a sweetened variety of non-dairy milk, your pops may turn out extra sweet. When you’re dipping the pops, don’t worry too much about getting them back into the freezer. They hold up long enough to do all the dipping. From there, I like to serve them either right away or like to use a gallon sized freezer bag like the ones by Stasher to store them for up to a week. The recipe states that it makes 10 pops, but this is dependent upon your mold. If your molds are smaller or larger it may make 1-2 more or less.
Purchase Gallon Stasher Bag Here

Gluten Free Dairy Free Chocolate Dipped Cookies and Cream Fudge Pops
Makes 10 pops
Ingredients:
- 1 can full-fat coconut milk (choose a kind that is able to be whisked smoothly, like Thai Kitchen)
- 1 cup unsweetened oat or coconut milk from a carton or 1 cup more of canned coconut milk (the extra creamy variety oat milk works well)
- 1/3 cup cocoa powder
- 2/3 cup powdered sugar
- 2 teaspoons vanilla extract (omit if you are using a vanilla flavored non-dairy milk)
- 15 oreos, broken up into pieces
- 1 cup dairy free chocolate chips (for magic shell)
- 2 tablespoons coconut oil (solid, for magic shell)
Directions:
- In a gallon sized freezer bag or in a container, lightly crush the Oreos into pieces (not crumbs). I like to use the bottom of a measuring up for this, but you can also just use your hands.
- Placed the canned coconut milk into a medium sized mixing bowl or extra large measuring cup (I prefer something with a spout for easier pouring later) and whisk until smooth and uniform.
- Whisk in 1 cup of unsweetened, extra creamy oat or coconut milk (you can also use more canned coconut milk, just make sure it’s whisked until smooth before adding), 1/3 cup cocoa powder, 2/3 cup powdered sugar, and 2 teaspoons vanilla extract. The cocoa powder will eventually give in and mix thoroughly, just keep whisking.
- Fill each popsicle mold halfway up with the mixture, then disperse the Oreo pieces equally among them (it doesn’t have to be exact).
- Fill the popsicle molds up the rest of the way and place in the freezer for 4 hours or overnight.
- Make the magic shell. When the popsicles have frozen solid, mix 1 cup dairy free chocolate chips with 2 tablespoons coconut oil. I like to use a microwave safe vessel that is taller and more narrow for easier dipping, like a glass measuring cup instead of a bowl, but you can always pour it into something different after it’s all melted.
- Melt the mixture in the microwave in 30 second intervals, stirring between each, until melted. If it looks almost melted but needs just a bit more, use a 15 second interval so the chocolate doesn’t burn.
- Prepare a baking sheet with parchment paper or a silicon baking mat. Loosen all of the pops from the mold before starting to dip. Dip the pop about halfway up into the magic shell, then lay the pop on a baking sheet covered with parchment or a silicon baking mat, and continue with the rest of the pops. You should not have to place them back in the freezer immediately as you’re dipping if you’re in a cooler environment. They do not melt as easily as ice cream.
Notes:
Making the magic shell ahead: You can make the magic shell ahead of time and store it covered, in the refrigerator for up to a week. To re-melt, place in the microwave for 30 seconds at a time, stirring in between each interval.
Choosing the right non-dairy milk: As mentioned above, extra-creamy varieties of non-dairy milk work best here, but you can use whatever you have on hand. Just be aware that the more low-fat variety of ingredients you use in this recipe, the more icy the pops will turn out in the end.
Popsicle storage: These popsicles will keep in a gallon sized storage bag or wrapped tightly, individually in plastic wrap.
See notes in the post above for more helpful tips
Did you make this recipe? Don’t forget to tag and follow me on Instagram @lizlaughlovefood and use the hashtag #lizlaughlovefood
Like my Facebook Page Liz Laugh Love Food
What’s new on the blog

My Blog Has Moved!
If you are reading this post, thank you for your continued support to Liz Laugh Love Food. Over the last several months,…
Keep reading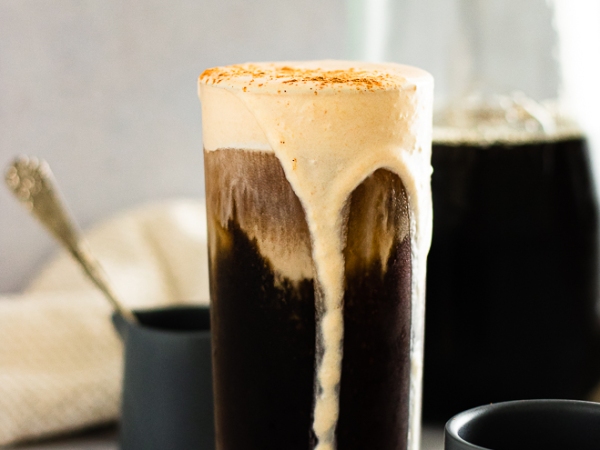
Brown Sugar Pumpkin Cream Cold Brew
I confess, I will buy a grande pumpkin cream cold brew the day they drop every. single. year, but to be completely…
Keep reading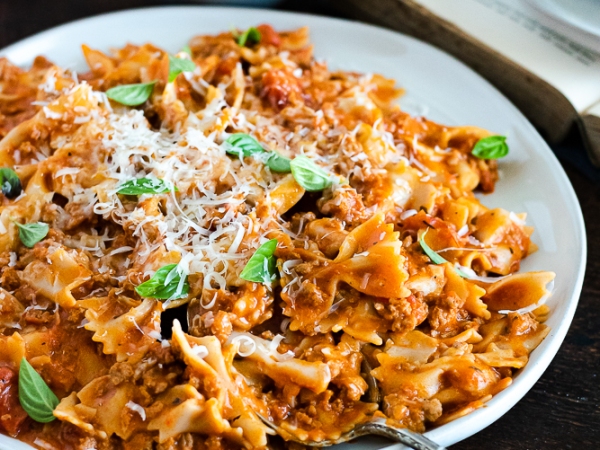
One Pot Gluten Free Creamy Italian Sausage Pasta Skillet
If you have spent any time rummaging around my blog, you know that I am a little obsessed with easy weeknight meals…
Keep reading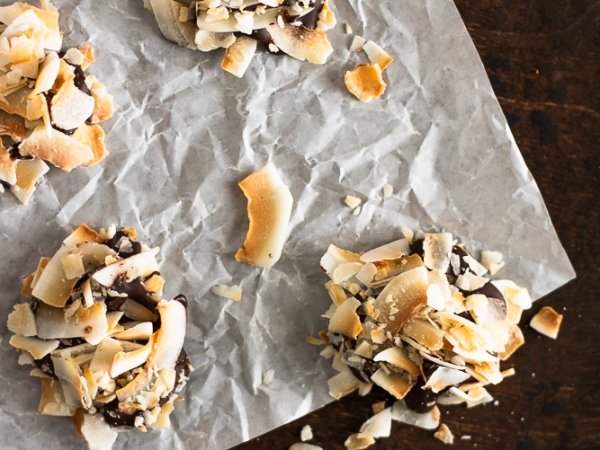
Gluten Free Vegan Dark Chocolate Coconut Clusters
These coconut clusters are straightforward, simple, and absolutely delicious. They’d be a great addition to a charcuterie board or a special movie…
Keep readingLoading…
Something went wrong. Please refresh the page and/or try again.
